article number
216023

Brodit fixed installation holder Zebra TC20/TC25

€191.95
Not in stock
-
+
  • Fast Shipping
  • High Quality Products
  • Secure Payments
Details
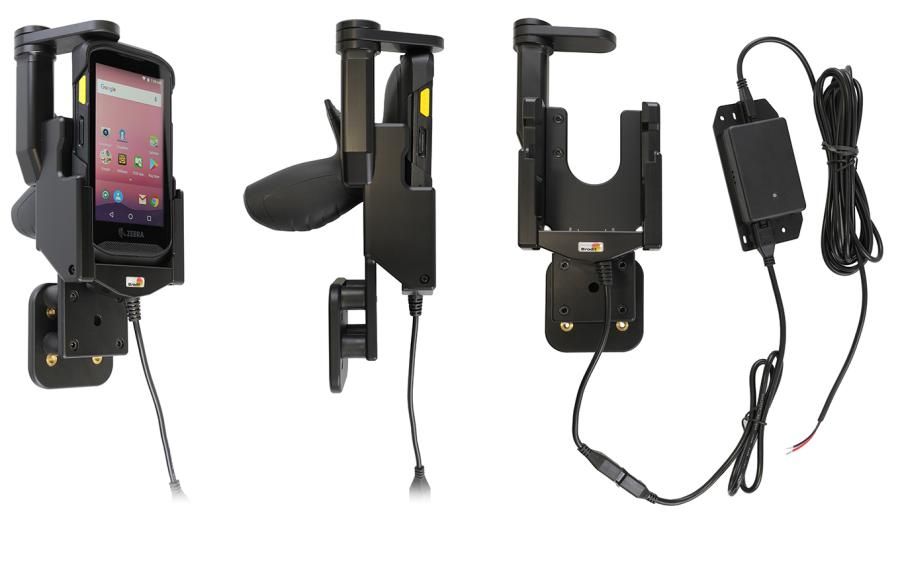
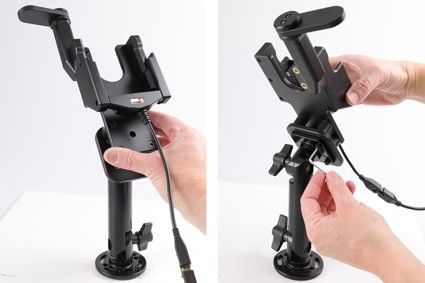
The choice for you who want to have you PDA firmly in place, properly attached and still within easy reach. The holder has a strong, robust design to withstand rough handling in professional use. The swiveling top part keeps your device extra securely in place in the holder, it "locks" the device in the holder so that it can not shake the least. It is easy to place the PDA in the holder, and to take it with you when leaving the vehicle. Attach onto a Pedestal Mount.
 
An active holder which is to be connected inside the dashboard, this gives a discreet, neat installation without cables hanging over the interior! You can choose to use the holder as an active holder for charging of your device only, or to connect an adapter to the Molex connector for additional features. Then you can use the holder also for power supply of a GPS receiver or other own solutions (can not be used for data communication or audio connection). 12/24 Volt. The product is E-approved. Connect the power cable with a 2 A fuse. 2 A charger. Professional installation recommended. Made of Acetal/ABS plastic. Color: Black. Made in Sweden.
More Information
More Information
Accessory brand Brodit
Barcode 7320282160234
Recommended retail price incl. VAT €191.95
Device with or without cover Without case
Holder feature Device-specific
Holder extras Shock dampeners, With pistol grip
Cable / Qi / charger type / connnector Molex, fixed install, piggy tail (Easy Switching)
Input Voltage 12/24V geschikt
Voltage (output) QC - QuickCharge
Max Amperage 3,0 Amp
Montage standaard AMPS
Device holder lockable? yes swivel
Color black
Productinfo Brodit houder
Show more + Show less -
Reviews
Write Your Own Review
You're reviewing:Brodit fixed installation holder Zebra TC20/TC25
Compatibility
Show more + Show less -
Instruction
Please read all of the instructions and look at the pictures before attaching the holder. Important Note: Route the cable from the holder into the vehicle dashboard and route the power cable from the charger unit to the power supply source in the vehicle and connect as follows: 1. Connect the White wire to a Negative Ground connection of the vehicle or the vehicle chassis.
2. Connect the Red wire to a 12/24 Volt power supply in the vehicle that is controlled by the ignition switch of the vehicle.

Please read all of the instructions and look at the pictures before attaching the mount.
 
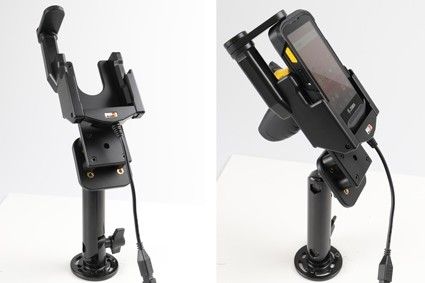
1. Attach the mount: Place the mount into the desired position and attach it with the enclosed screws.
 
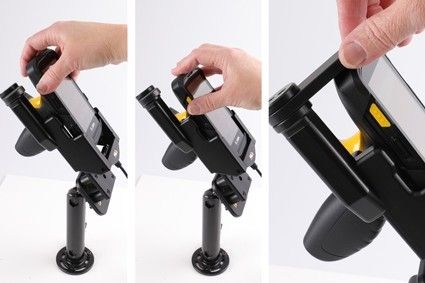
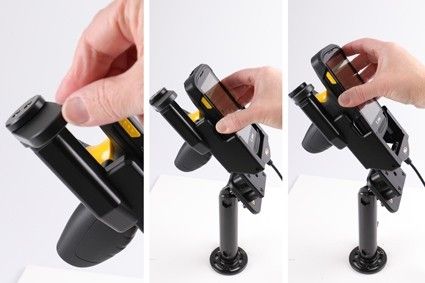
2. To place the device in the holder: Place the device over the holder and slide it straight downward into the holder. Turn the swiveling top support sideways in order to "lock" the device in place in the holder.
 
3. Remove the device: Turn the swiveling top support sideways in order to set the device free. Lift the device straight upward, out from the holder.
 
4. The mount is in place.

Scroll to top